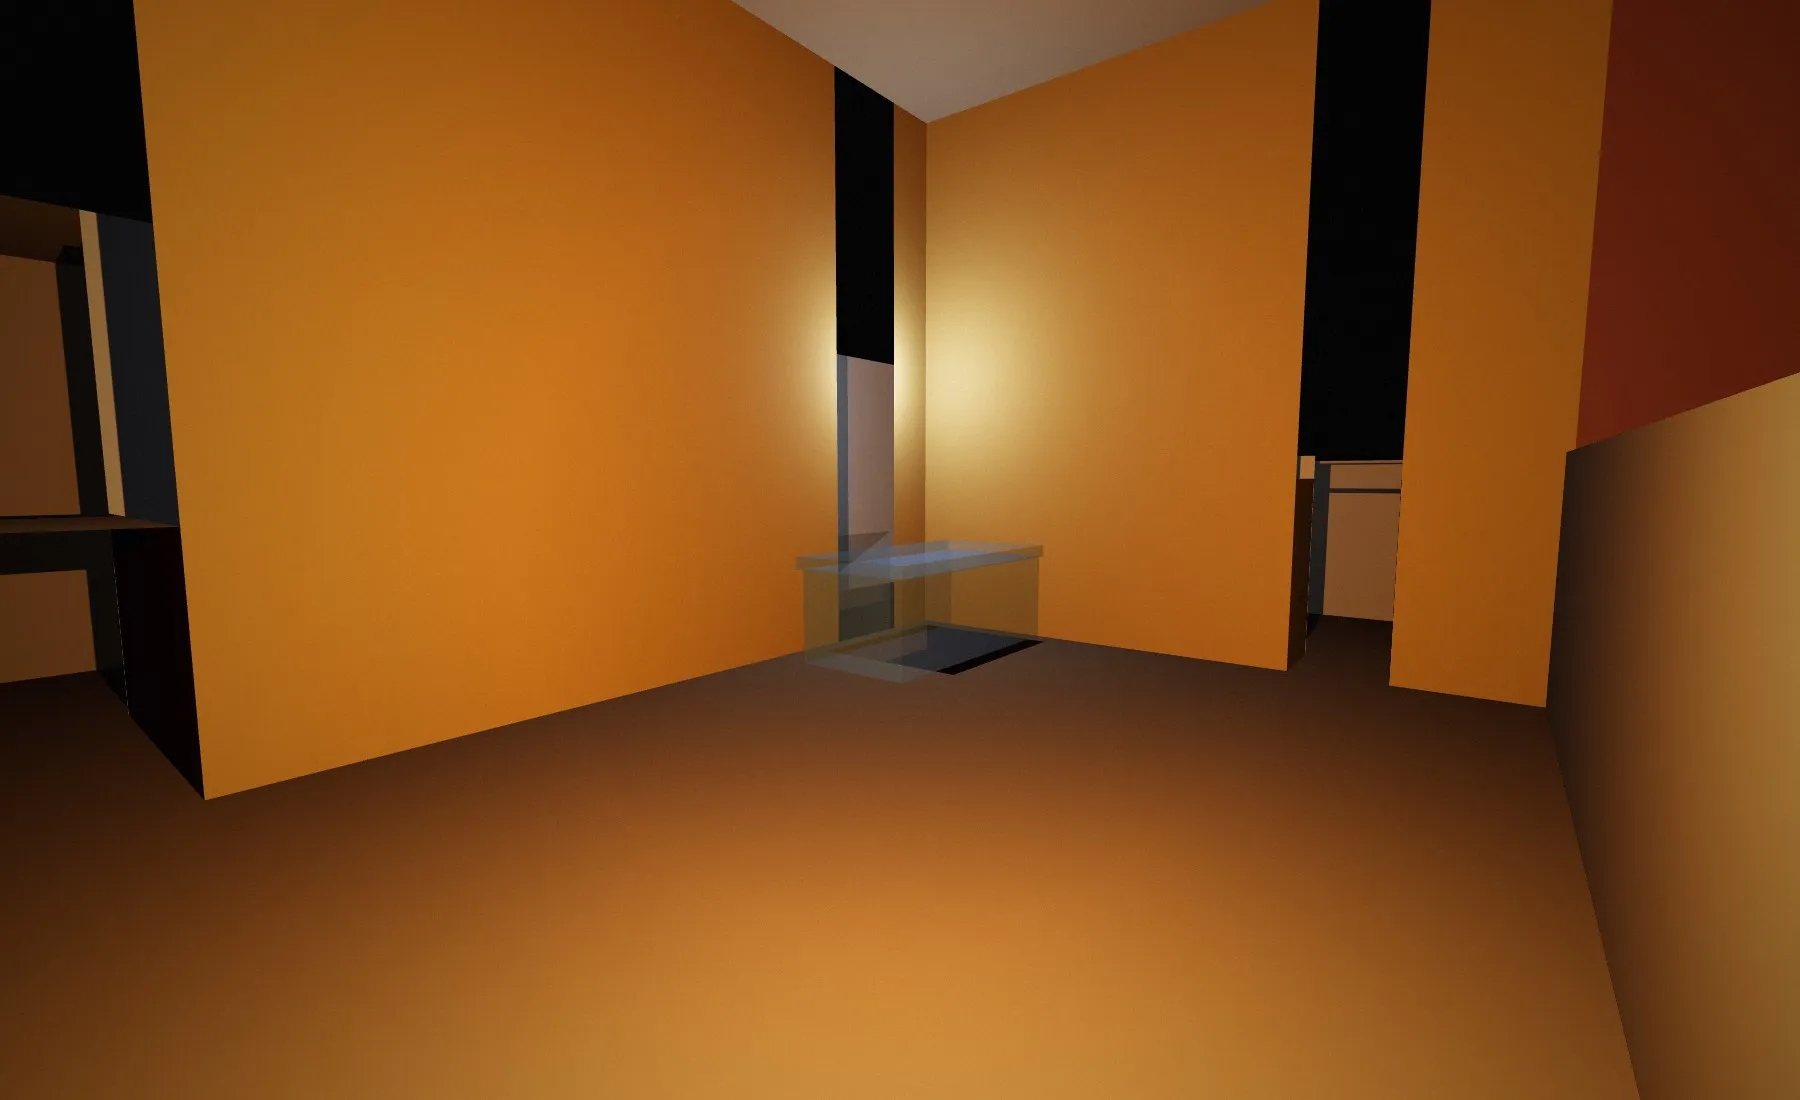
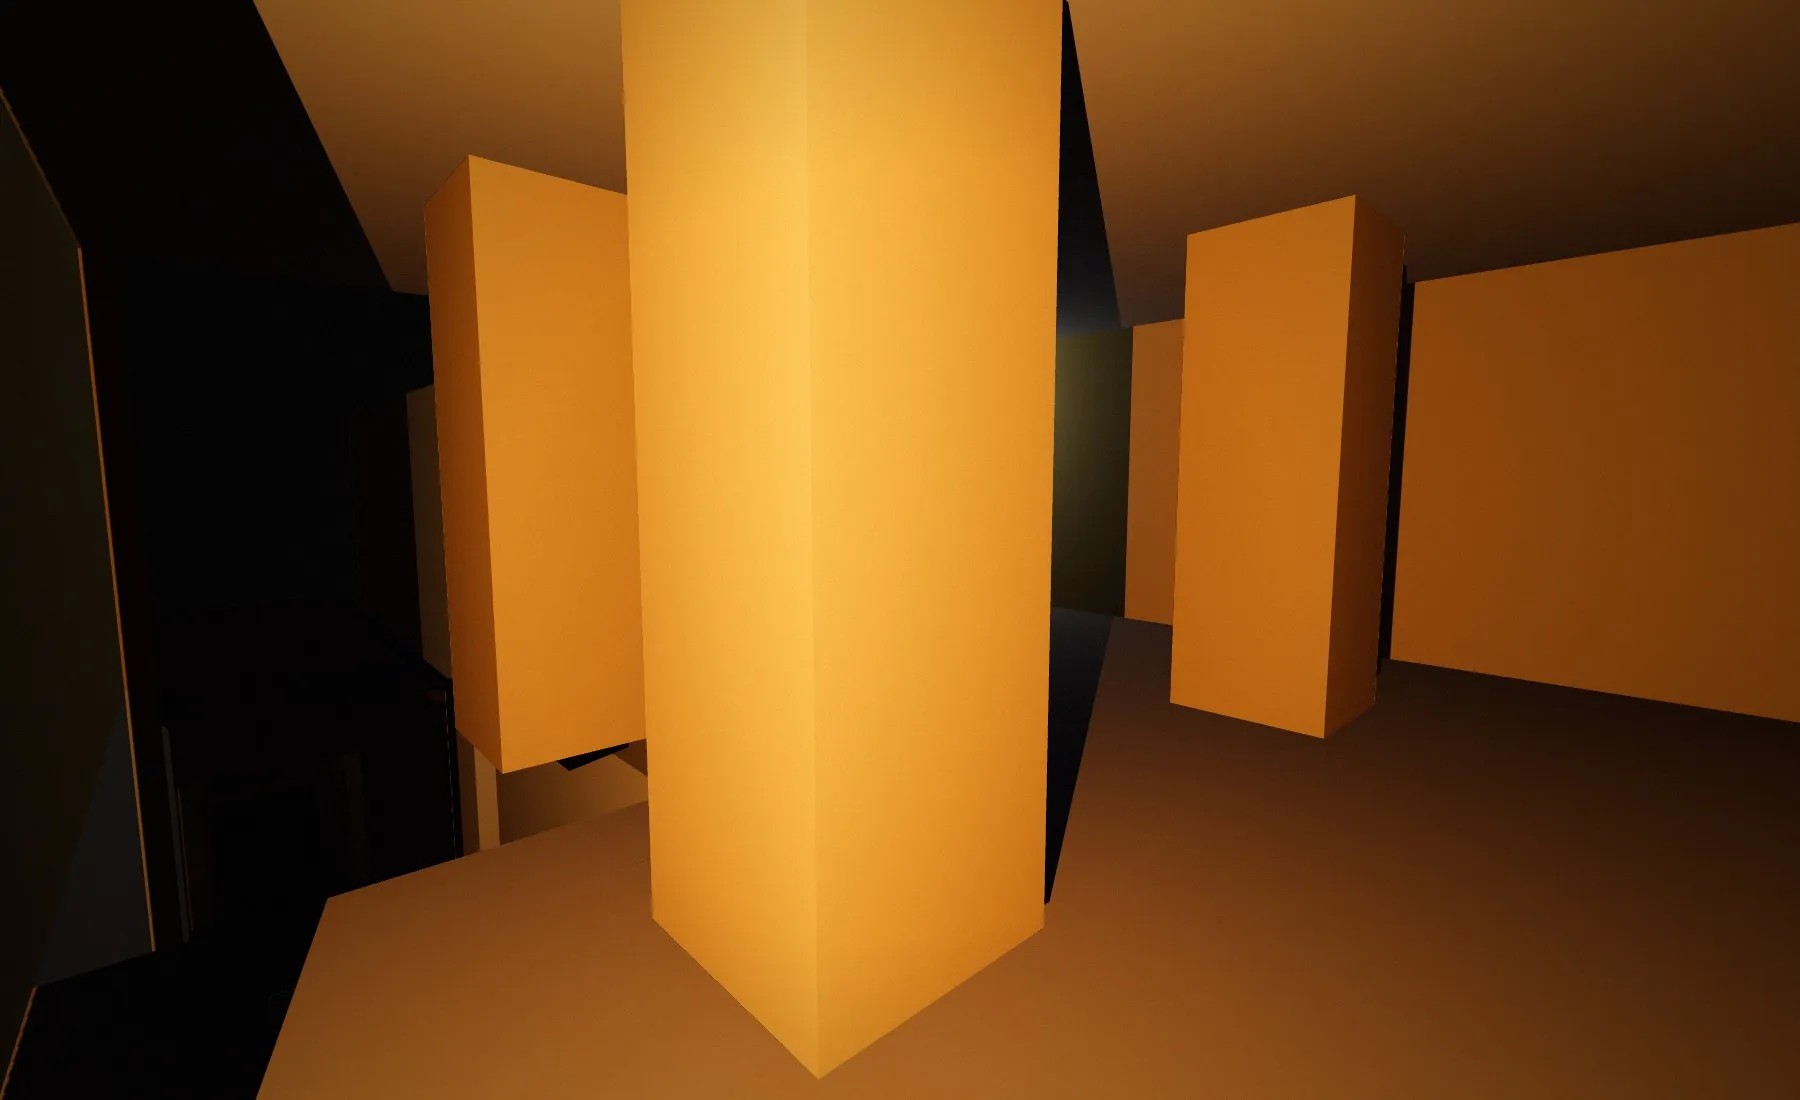
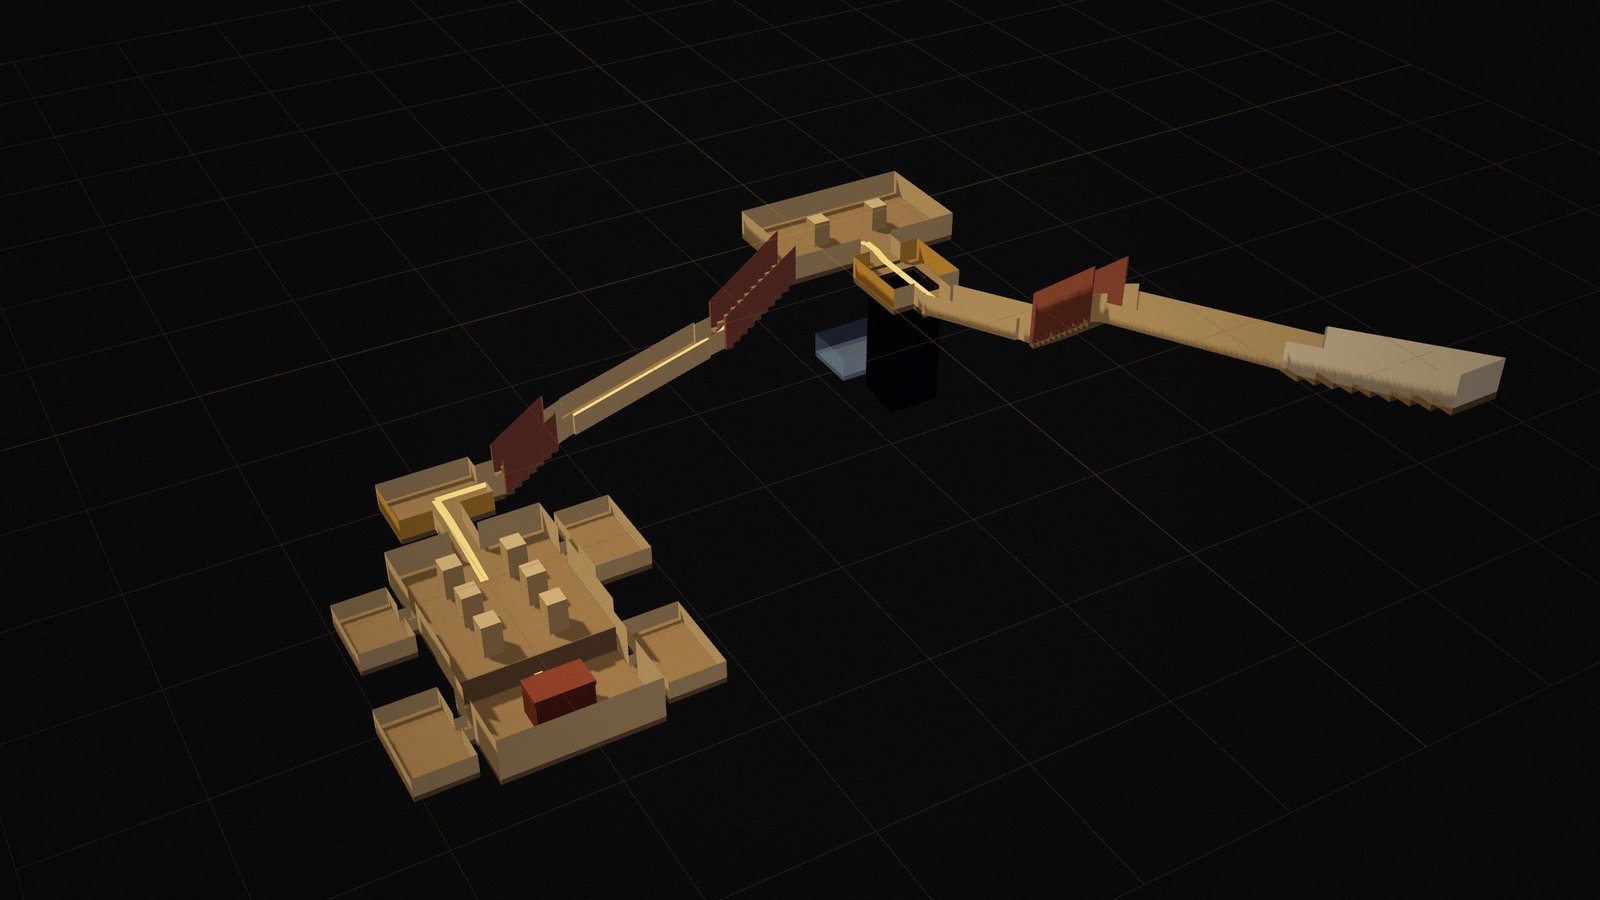
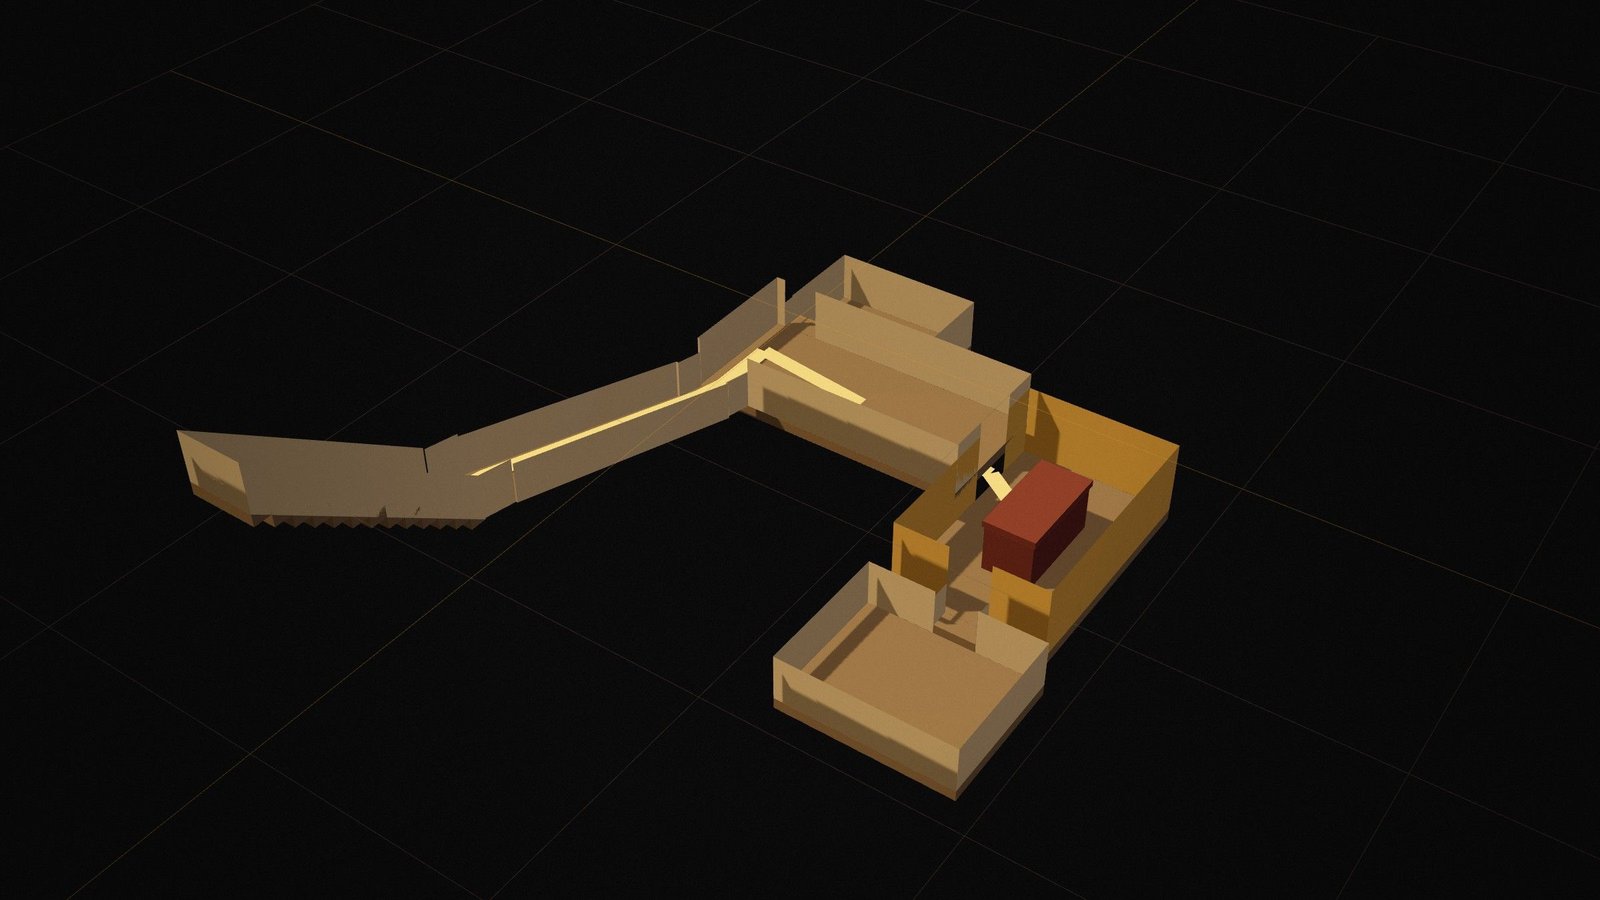
Cut-away 3D model of the tomb of Seti I descending through the hillside, from the entrance stairway to the pillared burial chamber and the tunnel beyond.
Interpretive 3D model · NeoKemetAI interpretive 3D model
Tomb · 19th Dynasty · Valley of the Kings

KV17: Tomb of Seti I

Valley of the Kings, western Thebes

Seti I, father of Ramesses II, commissioned the most ambitious tomb in the valley. The Theban Mapping Project describes it as the longest and deepest tomb in the valley, and almost every wall, pillar and ceiling is carved and painted in raised relief of exceptional quality.

The Italian explorer Giovanni Battista Belzoni found it in October 1817. The king’s mummy was already gone: it had been moved in antiquity and was found in 1881 in the royal cache at Deir el-Bahari. Belzoni removed the magnificent translucent calcite sarcophagus, which was bought by the architect Sir John Soane in 1824 and is still in his house-museum in London.

Beyond the burial chamber a narrow tunnel descends into the rock. An Egyptian mission re-excavated it between 2007 and 2010, clearing about 174 m to the point where the cutting stops; why it was cut remains unknown.

Inside the tomb

Explore the chambers

Follow the tomb from its entrance to the burial chamber. Select a space in the list, the plan or the 3D model.

Interactive cut-away model of KV17, the longest tomb in the Valley of the Kings, with its corridors, well, pillared halls and burial chamber.

A · Stairway

Entrance stairway

Documented architecture

Belzoni's workmen uncovered the entrance in October 1817, and the tomb is still sometimes called "Belzoni's tomb". Twenty-six ancient steps lead down to corridor B.

15.81 m long × 2.71 m wide, height not published (shown 3 m) (published) · Descends from about 0 to 5 m below the entrance · Floor level reconstructed

Note: Length and width follow the survey; the height and the drop of the steps are reconstructed.

B · Corridor

First corridor

Documented architecture

The decoration begins at once, in painted raised relief. The king stands before Ra-Horakhty, followed by the opening of the Litany of Re, a hymn naming the sun god's forms.

Decoration: Seti I before Ra-Horakhty and the Litany of Re; flying vultures on the ceiling.

Wall scenes

  • The Litany of ReSeti I before Ra-Horakhty under a winged cobra, followed by the opening scene of the Litany of Re, the hymn invoking the sun god under his many names.

10.61 m long × 2.62 m wide, 2.58 m high (published) · Descends from about 5 to 9 m below the entrance · Floor level reconstructed

C · Stairway

Stairwell

Documented architecture

Steps descend at a steep thirty degrees, with trapezoidal recesses at the tops of the walls. The Litany of Re continues, then the third hour of the Amduat, left partly in outline.

Decoration: Litany of Re; Book of the Dead spell 151; the third hour of the Amduat, partly unfinished.

7.72 m long × 2.6 m wide, 3.81 m high (published) · Descends from about 9 to 14 m below the entrance · Floor level from published figures

Note: The 4.46 m drop follows from the published length and 30° slope; the level it starts from is reconstructed.

D · Corridor

Third corridor

Documented architecture

The fourth and fifth hours of the Amduat, the guide to the sun's journey through the night, cover the two walls.

9.09 m long × 2.61 m wide, 2.78 m high (published) · Descends from about 14 to 18 m below the entrance · Floor level reconstructed

E · Well chamber

Well chamber

Documented architecture

Damaged

A shaft cuts through the floor of this room. It is not known whether the widening at its bottom was intentional. Belzoni found the wall beyond the shaft plastered and painted, and broke through it.

Decoration: Anubis, the king led by Horus to Isis and to Hathor, the king before Osiris and the Western Goddess; yellow stars on a blue ceiling.

Damaged: The far wall was broken through by Belzoni in 1817 to reach the rooms beyond.

On the model

  • Belzoni's breachReconstructedThe painted wall beyond the shaft originally closed off the lower part of the tomb. Belzoni's men broke through it in 1817.
  • Well shaftReconstructedA vertical shaft; its size and depth (about 8 m in the model) are not published and are illustrative.

3.65 m long × 4.17 m wide, 2.46 m high (published) · Floor about 18 m below the entrance · Floor level reconstructed

Note: The room follows the survey. The shaft has not been fully cleared and is not measured on the survey page; its size and 8 m depth are illustrative only.

F · Pillared hall

Four-pillared chamber

Documented architecture

A roughly square chamber with two rows of two pillars flanking the axis, decorated with the Book of Gates. One scene shows the four "races" of mankind, for the first time distinguished by their physical features. On the rear wall Horus presents the king to Osiris and Hathor.

Wall scenes

  • The Book of GatesThe fourth and fifth divisions of the Book of Gates in three registers, including the four "races" of mankind.
  • The king before OsirisHorus presents Seti I to Osiris and Hathor.

8.43 m long × 7.95 m wide, 3.16 m high (published) · Floor about 18 m below the entrance · Floor level reconstructed

Note: The size and four pillars follow the survey; the pillar positions are reconstructed.

Fd · Stairway

Descent in the floor of F

Documented architecture

A stairway cut into the floor at the rear corner of the pillared chamber. From here the axis of the tomb is displaced to the left.

4.98 m long × 2.44 m wide, 3.25 m high (published) · Descends from about 18 to 21 m below the entrance · Floor level reconstructed

Note: Its place in the rear south-east corner of F follows the survey description; the depth it reaches is reconstructed.

Fa · Side room

Side chamber (the "Drawing Room")

Reconstructed geometry

Unfinished

A two-pillared room beyond the pillared chamber, its floor several steps lower. Its walls carry the ninth to eleventh hours of the Amduat drawn in black outline only, a rare look at how the decoration was laid out before carving. A break in the bottom of its left wall opens into corridor G.

Unfinished: The decoration was never carved or painted; it is drawn in black outline only.

Wall scenes

  • Unfinished outline drawingsThe ninth, tenth and eleventh hours of the Amduat drawn in black outline, never carved.

On the model

  • Break into corridor GReconstructedA break at the bottom of the left wall opens into corridor G.

About 8.6 × 7.9 m, 3.7 m high (model) · Floor about 19 m below the entrance · Floor level reconstructed

Note: Size and pillar count follow the survey. Its sideways offset from F (to clear corridor G), the pillar positions and the floor level are reconstructed.

G · Corridor

Fourth corridor

Documented architecture

The tomb continues a little to the right of the previous axis. The walls carry the Opening of the Mouth ritual; vandals have cut out many cartouches, texts and figures.

Wall scenes

  • The Opening of the MouthPriests restore the senses of the king's statue so that it can breathe, eat and speak in the afterlife.

8.94 m long × 2.62 m wide, 2.64 m high (published) · Descends from about 21 to 24 m below the entrance · Floor level reconstructed

H · Corridor

Fifth corridor

Documented architecture

Five steps lead into this corridor. Recesses along the upper walls carry more of the Opening of the Mouth; below them is the Litany of the Eye of Horus.

5.28 m long × 2.63 m wide, 2.7 m high (published) · Descends from about 24 to 26 m below the entrance · Floor level reconstructed

I · Chamber

Antechamber

Reconstructed geometry

The king is shown with various deities, including Ptah and Nefertem on the rear wall. Squeezes taken in the nineteenth century caused considerable loss of colour.

Wall scenes

  • The king before the godsSeti I with Ptah and Nefertem on the rear wall.

About 5.3 × 4.2 m, 2.5 m high (model) · Floor about 26 m below the entrance · Floor level reconstructed

Note: The survey's printed length (2.25 m) conflicts with its area; the length is taken from the area.

J · Pillared hall

Burial chamber, pillared level

Reconstructed geometry

Damaged

The upper part of the burial chamber, with two rows of three pillars along the axis, decorated with the Book of Gates. Side chambers Ja and Je open off its left and right walls. Three stepped descents lead to the sunken, vaulted rear.

Damaged: Pillar 2 has suffered structural damage; the face of pillar 5 was removed by Lepsius.

About 8.4 × 8.2 m, 3.4 m high (model) · Floor about 26 m below the entrance · Floor level reconstructed

Note: The overall size of the burial chamber follows the survey (14.26 × 8.38 m, up to 6.05 m high under the vault). How it divides between the pillared level and the sunken vaulted level, the pillar positions and the ceiling height of this level are reconstructed.

J↓ · Crypt

Burial chamber, vaulted level

Reconstructed geometry

The sunken rear of the burial chamber, the first vaulted burial chamber in the Valley. Three hours of the Amduat cover its walls, with winged Isis and Nephthys under the vault and astronomical figures on the ceiling. A rectangular pit at its north-west end gives access to tunnel K.

Wall scenes

  • The astronomical ceilingThe vaulted ceiling shows astronomical figures, stars and constellations of the night sky.

On the model

  • Calcite sarcophagus (original position)ReconstructedThe calcite sarcophagus, found lying across the pit that leads to tunnel K, box intact and lid shattered; now in Sir John Soane's Museum, London. Its size in the model is approximate.
  • Pit at the mouth of tunnel KReconstructedA rectangular pit at the north-west end of the sunken floor gives access to tunnel K. Its size and depth here are reconstructed.

About 8.4 × 6.1 m, 6.1 m high (model) · Floor about 28 m below the entrance · Floor level reconstructed

Note: The sunken level is described but not separately measured; its length, the drop from the pillared level and the pit at the mouth of tunnel K are reconstructed.

Ja · Side room

Side chamber

Reconstructed geometry

A small side room decorated with the third division of the Book of Gates.

About 3.2 × 2.6 m, 2.1 m high (model) · Floor about 26 m below the entrance · Floor level reconstructed

Note: Size follows the survey; its position along the wall is reconstructed.

Je · Side room

Side chamber of the Heavenly Cow

Reconstructed geometry

A side room inscribed with the Book of the Heavenly Cow, the myth of the sky goddess lifting the sun god away from rebellious humanity. The cow on the rear wall has lost colour to squeezes.

Wall scenes

  • The Book of the Heavenly CowThe sky goddess in the form of a cow carries the sun god away from humankind.

About 3.1 × 2.7 m, 1.9 m high (model) · Floor about 26 m below the entrance · Floor level reconstructed

Note: Size follows the survey; its position along the wall is reconstructed.

Jb · Side room

Two-pillared side chamber

Reconstructed geometry

A side chamber with two pillars and wide benches midway up three walls. Recesses below the benches show funerary objects such as animal-headed beds, chests and shrines; above them are the sixth to eighth hours of the Amduat.

About 8.1 × 7.9 m, 3 m high (model) · Floor about 28 m below the entrance · Floor level reconstructed

Note: Size and pillar count follow the survey; its position, the pillar positions and the benches (not modelled) are reconstructed or omitted.

Jd · Side room

Side chamber

Reconstructed geometry

A side room, now filled with relief fragments.

About 3.2 × 2.7 m, 2 m high (model) · Floor about 28 m below the entrance · Floor level reconstructed

Note: Size follows the survey; its position along the wall is reconstructed.

Jc · Side room

Unfinished four-pillared chamber

Reconstructed geometry

Unfinished

An unfinished, undecorated chamber behind the burial chamber, with four pillars in a row.

Unfinished: Unfinished and undecorated; rock movement over tunnel K has damaged pillars 3 and 4.

About 13.2 × 5.3 m, 3.7 m high (model) · Floor about 28 m below the entrance · Floor level reconstructed

Note: Size and pillar count follow the survey; its sideways position and the pillar positions are reconstructed.

K · Tunnel

Tunnel K (continues)

Uncertain or hypothetical

A passage reached through the floor at the rear of the burial chamber, with a divided stairway and a smooth central ramp. Belzoni found the sarcophagus lying across its mouth. Gates appear to have been placed at intervals along it.

About 16 × 1 m, 1.6 m high (model) · Descends from about 28 to 39 m below the entrance · Floor level reconstructed

Note: Only the first 16 m are shown, sloping at the published 34°; the tunnel was re-excavated over 174 m between 2007 and 2010, but its course is not modelled from a survey. Its purpose is unknown.
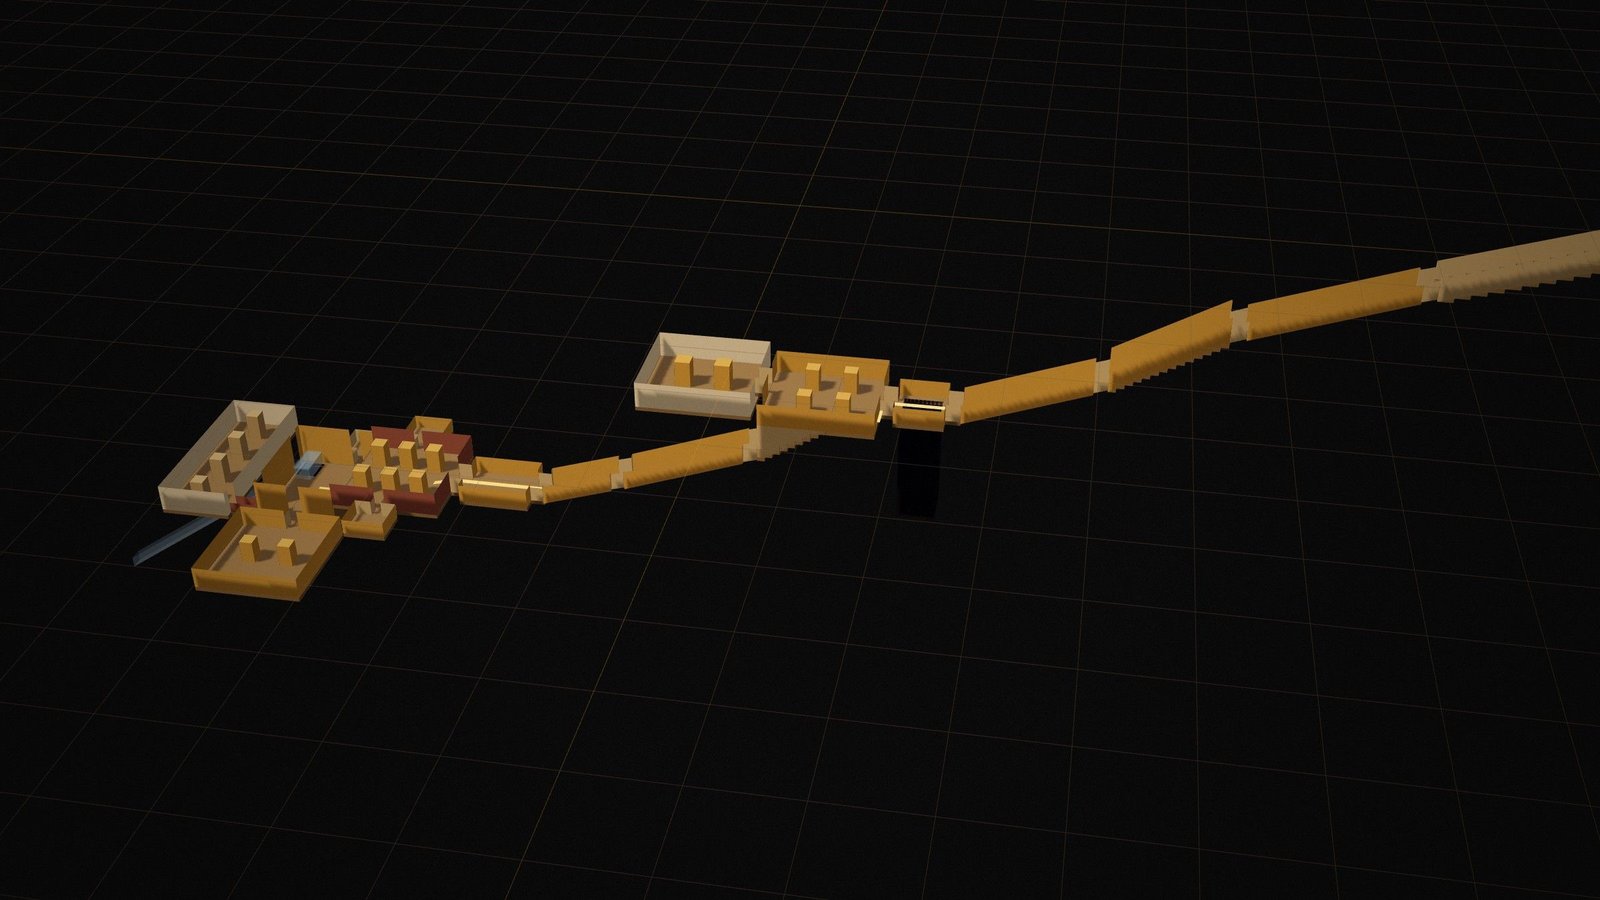
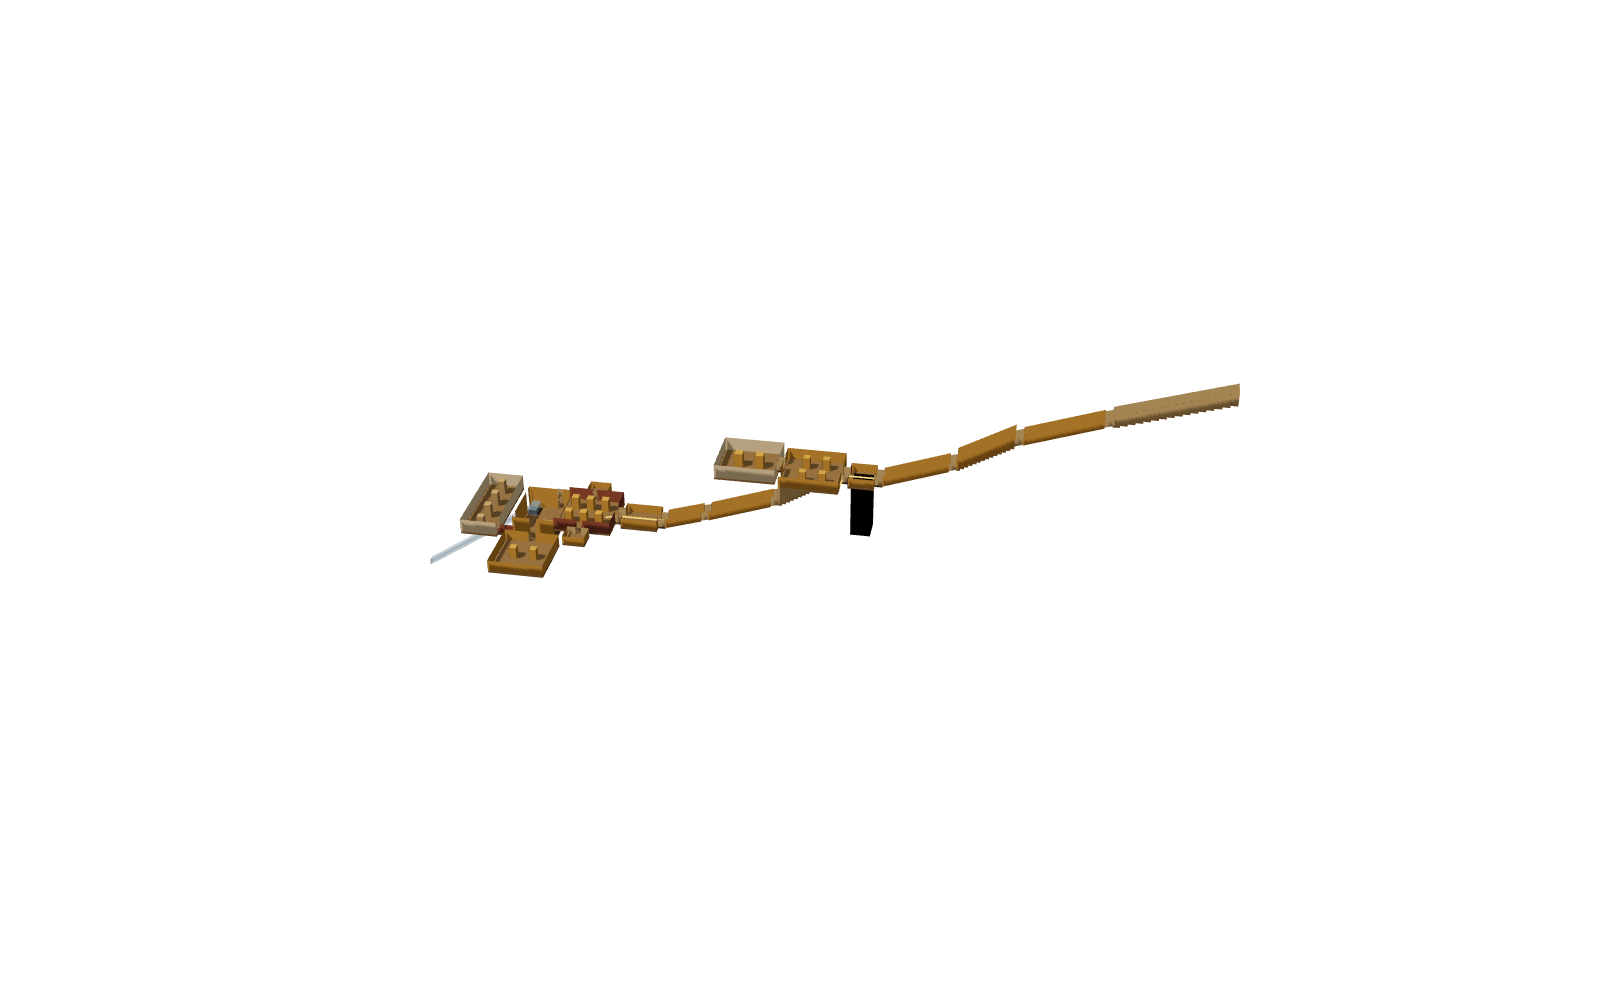
Every corridor, gate, chamber and side chamber down to the burial chamber is sized to the Theban Mapping Project survey of KV 17, using its letters (A–K). The survey gives measurements, not coordinates, so the lateral offsets (where the axis shifts left at the descent in F), the position of doorways along walls, the split between the two levels of the burial chamber and all floor depths are reconstructed. The tunnel K is shown only for its first metres. Sources and measurements for this reconstruction.

Every space down to the burial chamber is sized to the Theban Mapping Project survey. Sideways offsets and all depths are reconstructed, and the tunnel beyond the burial chamber is shortened.

Interpretive model of KV17: Tomb of Seti I. Surfaces are flat colours: decoration is shown as a tint, never redrawn, and nothing is modelled where no plan exists.

How to read our labels
Every image says what it is
Photo
Documented evidence: a photograph of the site or object.
Diagram
A plan, section or map drawn from published measurements.
Reconstruction
A visual reconstruction of how something looked, based on evidence.
Interpretive 3D model
A simplified architectural model to explore; not a survey.
Every space in a tomb has a status
Documented
Space and dimensions follow published surveys.
Approximate
The space is documented; its size or depth here is approximate.
Uncertain
Partly explored or disputed; shown to indicate, not to measure.

Sources for this reconstruction

Every corridor, gate, chamber and side chamber down to the burial chamber is sized to the Theban Mapping Project survey of KV 17, using its letters (A–K). The survey gives measurements, not coordinates, so the lateral offsets (where the axis shifts left at the descent in F), the position of doorways along walls, the split between the two levels of the burial chamber and all floor depths are reconstructed. The tunnel K is shown only for its first metres.

  1. Theban Mapping Project, "KV 17 (Sety I)", American Research Center in Egypt

    Used for: Chamber sequence (seven corridors, ten chambers, side chambers Fa and Ja–Je, passage K); length, width, height, area and orientation of every space and gate; pillar counts and widths; the 30° stairwell; positions of side chambers by wall; decoration by wall; the sarcophagus find-spot.

  2. A. Hamed, "Re-excavation of Seti First Tomb, KV17, Luxor, Egypt", International Journal of Conservation Science (2013; accepted September 2013)

    Used for: Tunnel K: re-excavated 2007–2010 over a length of 174 m; roughly 2 × 2 m cross-section; ancient ramp sloping 34° to 36° (after K. R. Weeks).

  3. G. B. Belzoni, Narrative of the Operations and Recent Discoveries … in Egypt and Nubia (London, 1820)

    Used for: The discovery in 1817 and the breach beyond the well. Not used for any dimension.

Floor levels. No floor depths are published on the Theban Mapping Project page, so all levels are reconstructed. The only published slopes are for stairwell C (steps at a steep 30°) and the tunnel K (its ancient ramp slopes at about 34° to 36°). KV 17 is described by the survey as the longest and deepest tomb in the Valley of the Kings.

How to read the model. A space marked documented has the size given in the survey. Where it sits along a wall and how deep its floor lies are reconstructed unless stated. Gates (doorway passages) are modelled at their surveyed thickness and width, which sets the width of each doorway in the model.

Published measurements and the model (33 spaces)
SpacePublished
length × width × height (m)
Model (m)SourceEvidence
A Entrance stairwayStairway15.81 × 2.71 × —44.49 m²Entryway A; orientation 218.68°; twenty-six ancient steps. No height published.15.81 × 2.71 × 3Matches (height not published)[1]Documented architectureFloor level reconstructed
gB Gate BGate1 × 2.07 × 2.482.06 m²1 × 2.07 × 2.48Matches[1]Documented architectureFloor level reconstructed
B First corridorCorridor10.61 × 2.62 × 2.5827.79 m²10.61 × 2.62 × 2.58Matches[1]Documented architectureFloor level reconstructed
gC Gate CGate1.08 × 2.1 × 2.382.26 m²1.08 × 2.1 × 2.38Matches[1]Documented architectureFloor level reconstructed
C StairwellStairway7.72 × 2.6 × 3.8119.97 m²Steps descend at a steep 30° angle; height irregular.7.72 × 2.6 × 3.81Matches[1]Documented architectureFloor level from published figures
gD Gate DGate0.96 × 2.07 × 2.41.98 m²0.96 × 2.07 × 2.4Matches[1]Documented architectureFloor level reconstructed
D Third corridorCorridor9.09 × 2.61 × 2.7823.65 m²9.09 × 2.61 × 2.78Matches[1]Documented architectureFloor level reconstructed
gE Gate EGate1.1 × 2.08 × 2.392.28 m²1.1 × 2.08 × 2.39Matches[1]Documented architectureFloor level reconstructed
E Well chamberWell chamber3.65 × 4.17 × 2.4615.17 m²3.65 × 4.17 × 2.46Matches[1]Documented architectureFloor level reconstructed
gF Gate FGate1.04 × 2.1 × 2.252.2 m²1.04 × 2.1 × 2.25Matches[1]Documented architectureFloor level reconstructed
F Four-pillared chamberPillared hall8.43 × 7.95 × 3.1666.75 m²Four pillars in two rows8.43 × 7.95 × 3.16Matches[1]Documented architectureFloor level reconstructed
Fd Descent in the floor of FStairway4.98 × 2.44 × 3.2512.24 m²In the rear (southern) corner of pillared chamber F.4.98 × 2.44 × 3.25Matches[1]Documented architectureFloor level reconstructed
gFa Gate FaGate0.99 × 1.57 × 2.341.68 m²0.99 × 1.57 × 2.34Matches[1]Reconstructed geometryFloor level reconstructed
Fa Side chamber (the "Drawing Room")Side room8.62 × 7.86 × 3.6767.62 m²Two pillars8.62 × 7.86 × 3.67Matches[1]Reconstructed geometryFloor level reconstructed
gG Gate GGate1.05 × 2.09 × 2.72.2 m²1.05 × 2.09 × 2.7Matches[1]Documented architectureFloor level reconstructed
G Fourth corridorCorridor8.94 × 2.62 × 2.6423.4 m²0.6° right of F.8.94 × 2.62 × 2.64Matches[1]Documented architectureFloor level reconstructed
gH Gate HGate1.04 × 2.09 × 2.342.17 m²1.04 × 2.09 × 2.34Matches[1]Documented architectureFloor level reconstructed
H Fifth corridorCorridor5.28 × 2.63 × 2.713.81 m²5.28 × 2.63 × 2.7Matches[1]Documented architectureFloor level reconstructed
gI Gate IGate1.05 × 2.07 × 2.092.29 m²1.05 × 2.07 × 2.09Matches[1]Documented architectureFloor level reconstructed
I AntechamberChamber5.25 × 4.16 × 2.5321.84 m²The survey page prints the length as 2.25 m, which does not match its own area (21.84 m² ÷ 4.16 m = 5.25 m). 5.25 m is used here.5.25 × 4.16 × 2.53Matches[1]Reconstructed geometryFloor level reconstructed
gJ Gate JGate1.04 × 2.08 × 2.332.28 m²1.04 × 2.08 × 2.33Matches[1]Documented architectureFloor level reconstructed
J Burial chamberPillared hall14.26 × 8.38 × 6.05126.55 m²Burial chamber J as a whole (both levels); six pillars, average width 1.04 m.14.26 × 8.38 × 6.05Matches[1]Reconstructed geometryFloor level reconstructed
gJa Gate JaGate0.77 × 0.78 × 1.960.6 m²0.77 × 0.78 × 1.96Matches[1]Reconstructed geometryFloor level reconstructed
Ja Side chamberSide room2.64 × 3.15 × 2.118.33 m²Off the left (south-east) wall of the pillared level.2.64 × 3.15 × 2.11Matches[1]Reconstructed geometryFloor level reconstructed
gJe Gate JeGate0.73 × 0.66 × 1.740.48 m²0.73 × 0.66 × 1.74Matches[1]Reconstructed geometryFloor level reconstructed
Je Side chamber of the Heavenly CowSide room2.67 × 3.07 × 1.898.18 m²Off the right (north-west) wall of the pillared level.2.67 × 3.07 × 1.89Matches[1]Reconstructed geometryFloor level reconstructed
gJb Gate JbGate0.91 × 1.01 × 2.11 m²0.91 × 1.01 × 2.1Matches[1]Reconstructed geometryFloor level reconstructed
Jb Two-pillared side chamberSide room8.06 × 7.91 × 363.67 m²Two pillars8.06 × 7.91 × 3Matches[1]Reconstructed geometryFloor level reconstructed
gJd Gate JdGate0.9 × 0.81 × 1.80.8 m²0.9 × 0.81 × 1.8Matches[1]Reconstructed geometryFloor level reconstructed
Jd Side chamberSide room2.66 × 3.22 × 2.038.55 m²Off the right wall of the sunken level.2.66 × 3.22 × 2.03Matches[1]Reconstructed geometryFloor level reconstructed
gJc Gate JcGate2.54 × 0.99 × 1.542.52 m²Rebuilt by Carter in brick with an arch.2.54 × 0.99 × 1.54Matches[1]Reconstructed geometryFloor level reconstructed
Jc Unfinished four-pillared chamberSide room5.32 × 13.2 × 3.7370.23 m²Four pillars in a row5.32 × 13.2 × 3.73Matches[1]Reconstructed geometryFloor level reconstructed
K Tunnel K (continues)Tunnel— × 0.99 × 1.57Width and (irregular) height at the start; no length on the survey page. Re-excavated over 174 m, 2007–2010 (Hamed).16 × 0.99 × 1.57Matches[1]Uncertain or hypotheticalFloor level reconstructed
SarcophagusBurial chamber, vaulted levelNot measured in the sources used; model size approximate2.85 × 1.2 × 1.05—Approximate
NeoKemet on YouTube

Watch

History for Sleep · 2 h 26 min · 20 Sept 2026 · 17 chapters

Boring History for Sleep | Every Pharaoh Dynasty of Ancient Egypt

Starts at 1:41:29 — “The Ramesside Kings”

The chapter on the Ramesside kings, including Seti I and his son Ramesses II.

Playlist: Sleep Documentaries

Gallery

Illustrations

Location

On the map

Tap a marker for details, or zoom out to see the whole Nile valley.

Map showing the location of KV17: Tomb of Seti IMemphisThebesAbydosAmarnaHierakonpolisElephantineAvaris / Pi-RamessesTanisSaisBubastisMendesSebennytosHerakleopolisItjtawyBuhenSemnaKV34 · Thutmose IIIKV43 · Thutmose IVKV62 · TutankhamunKV17 · Seti IKV7 · Ramesses IIQV66 · Queen NefertariStep Pyramid of DjoserGiza PlateauGreat Pyramid of GizaGreat Sphinx of GizaKarnak Temple ComplexMortuary Temple of HatshepsutAbu Simbel TemplesMedinet Habu
Coastline and Nile: Natural Earth 1:10m (public domain). Modern features such as Lake Nasser are omitted. Site positions are approximate.