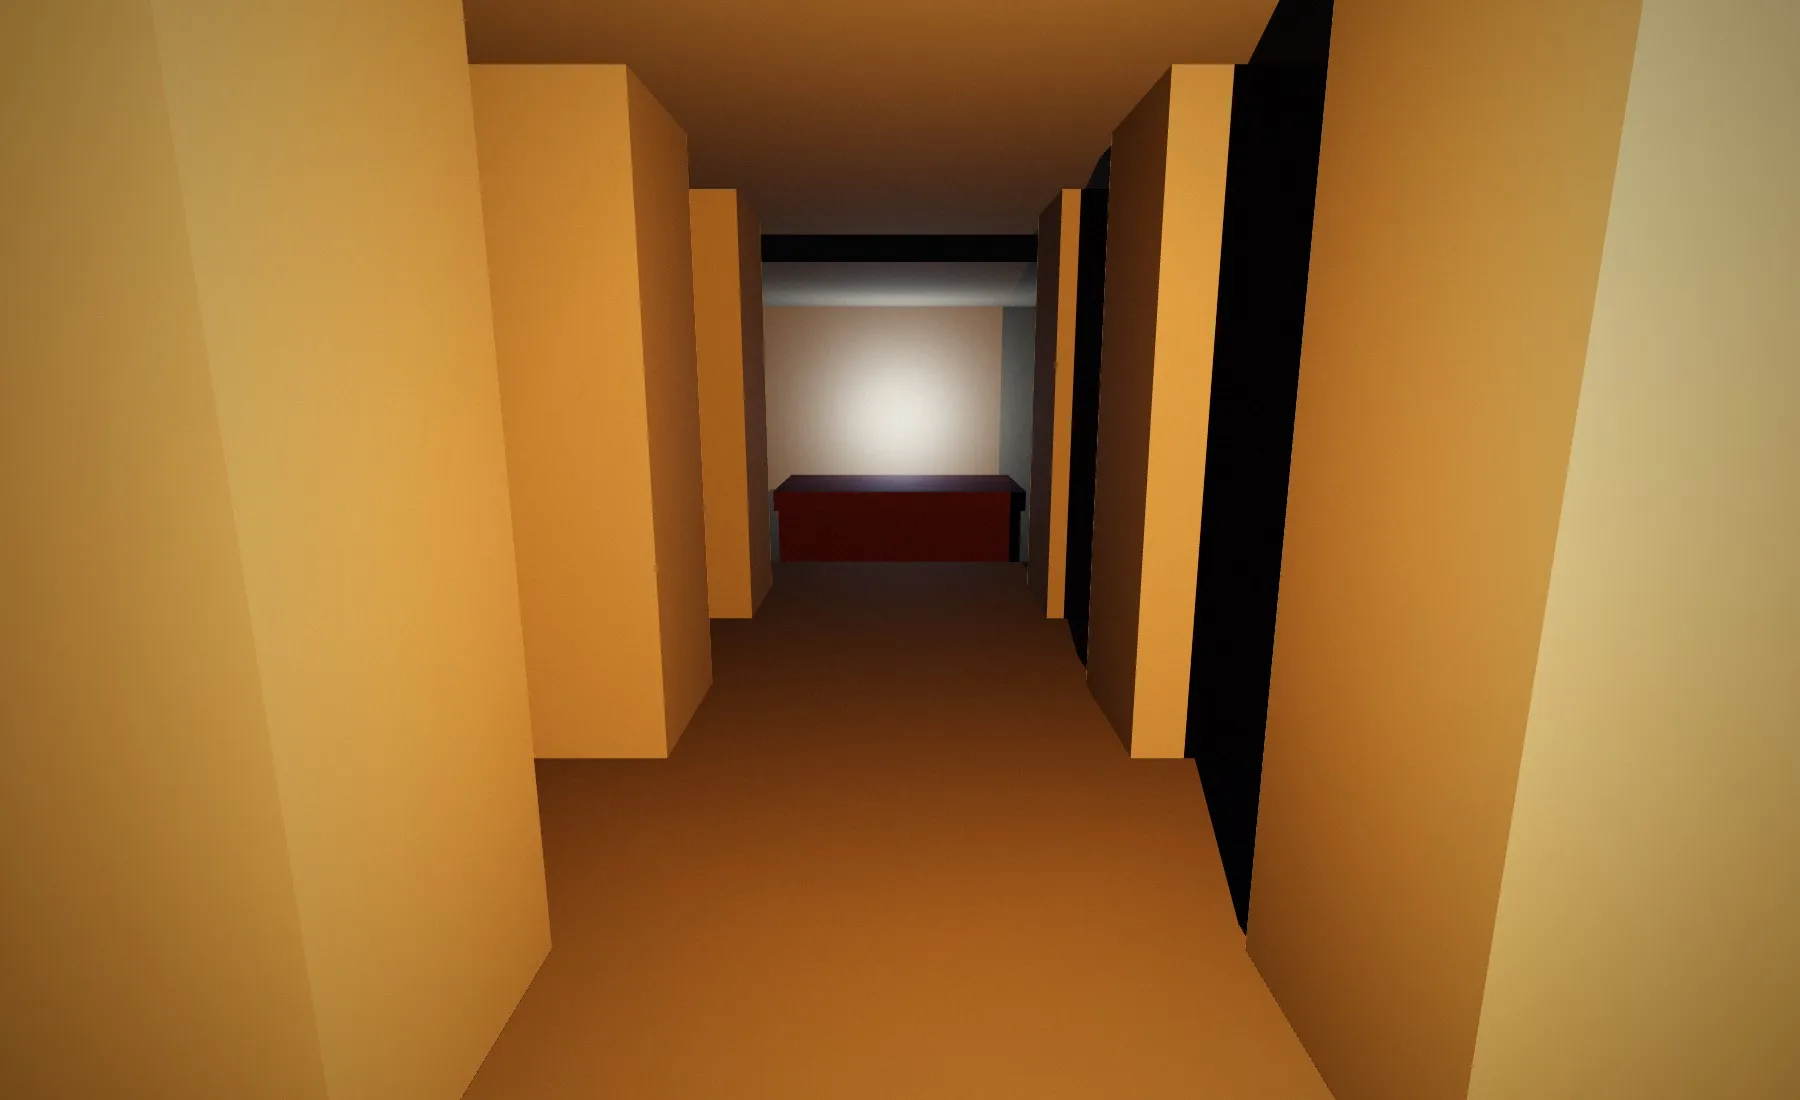
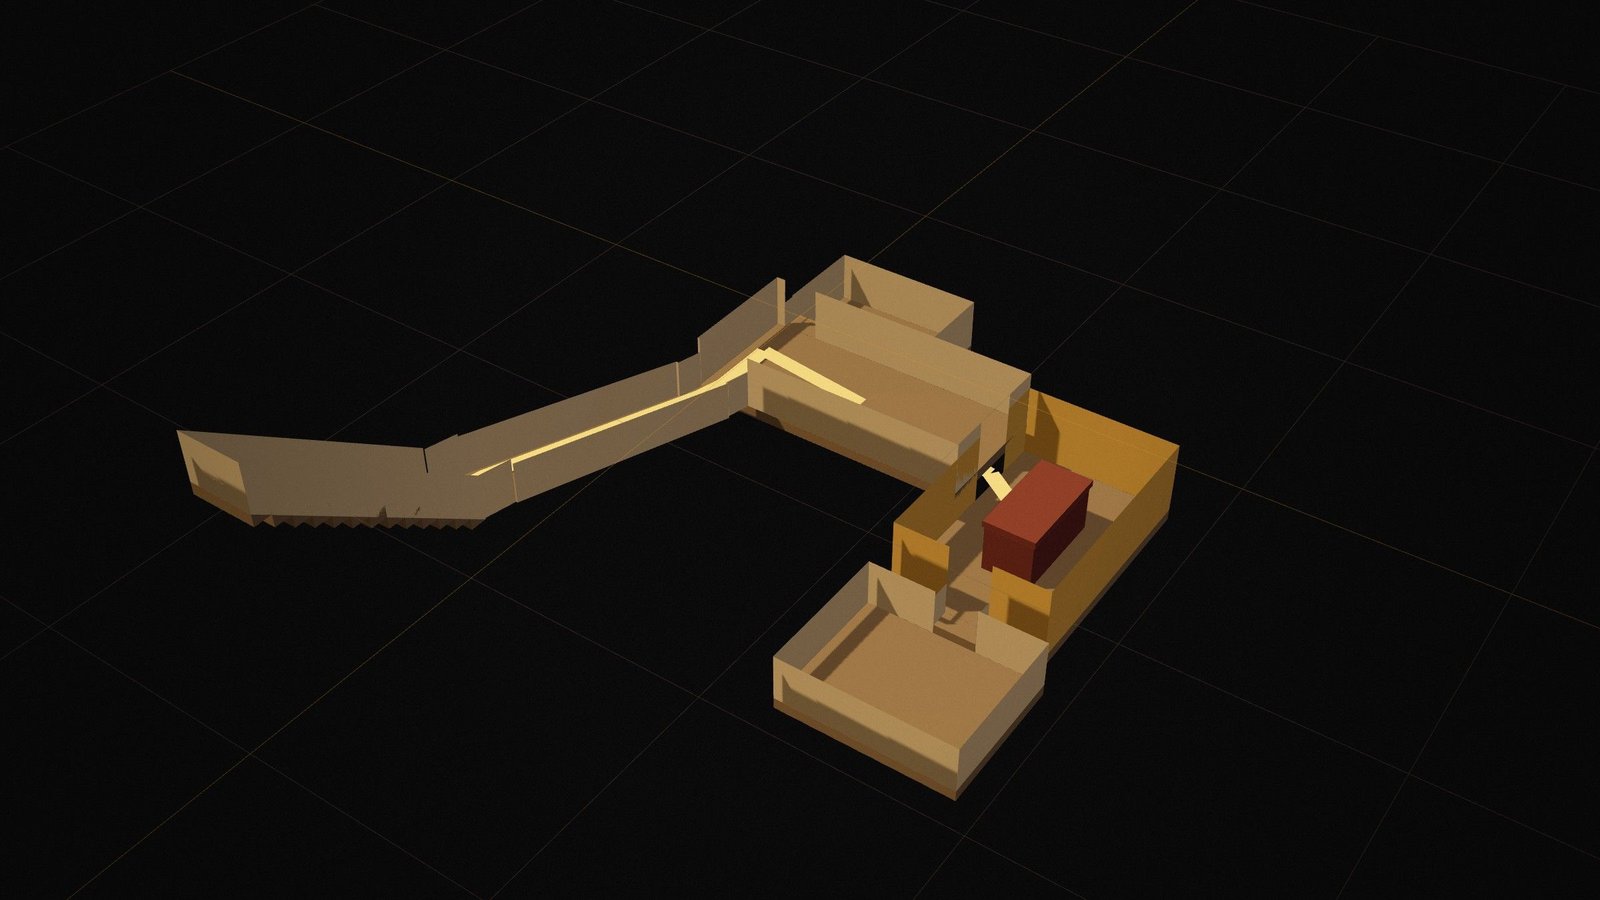
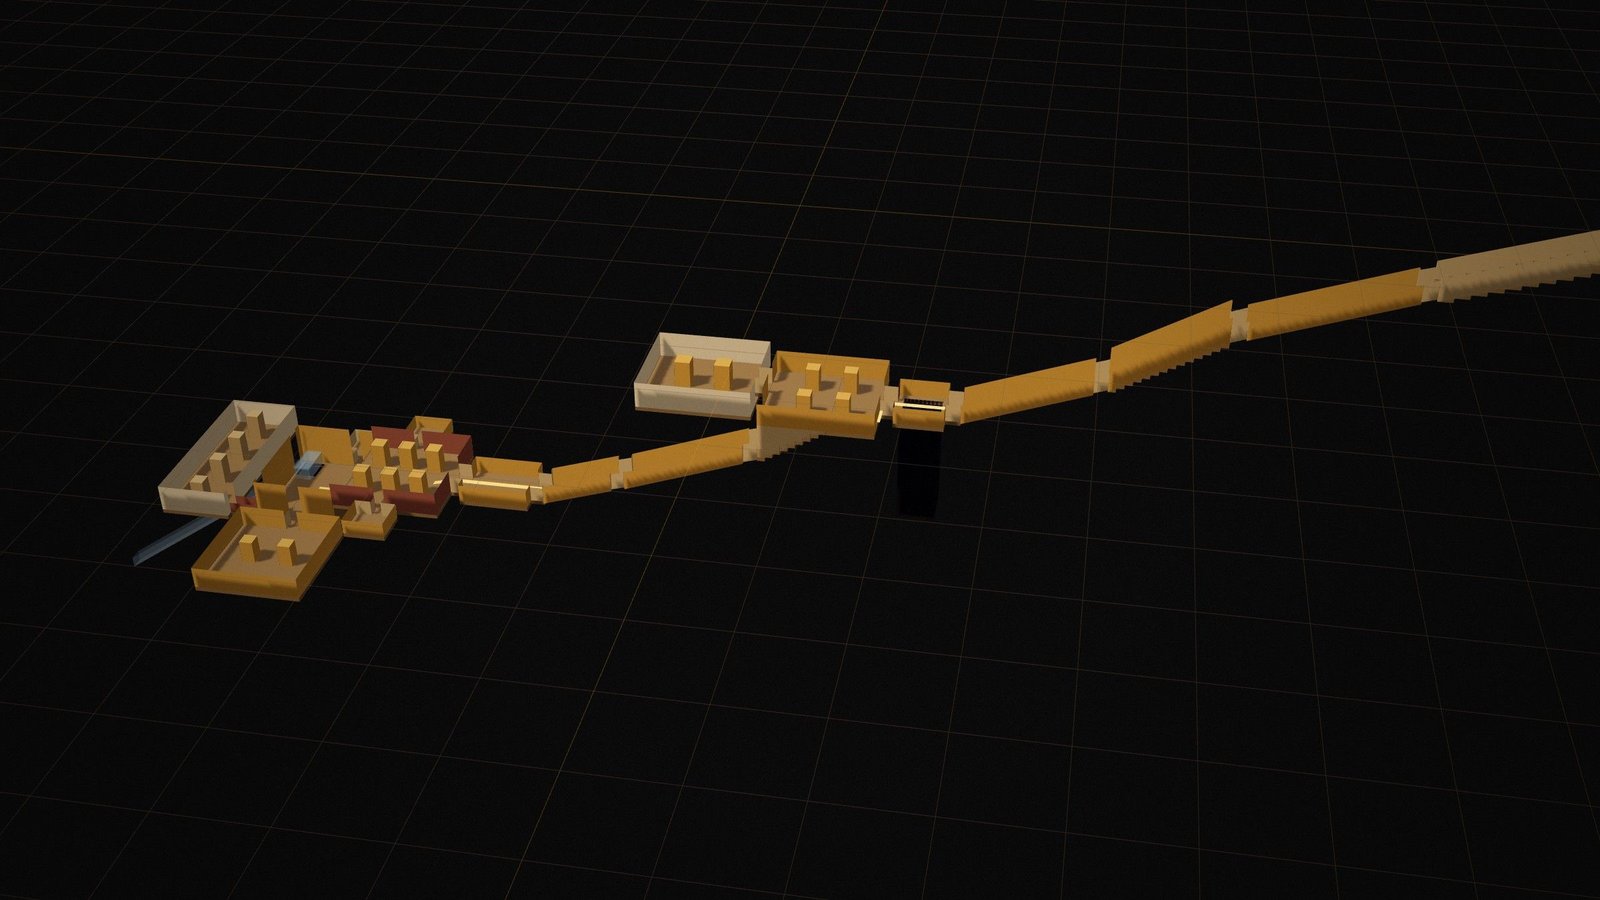
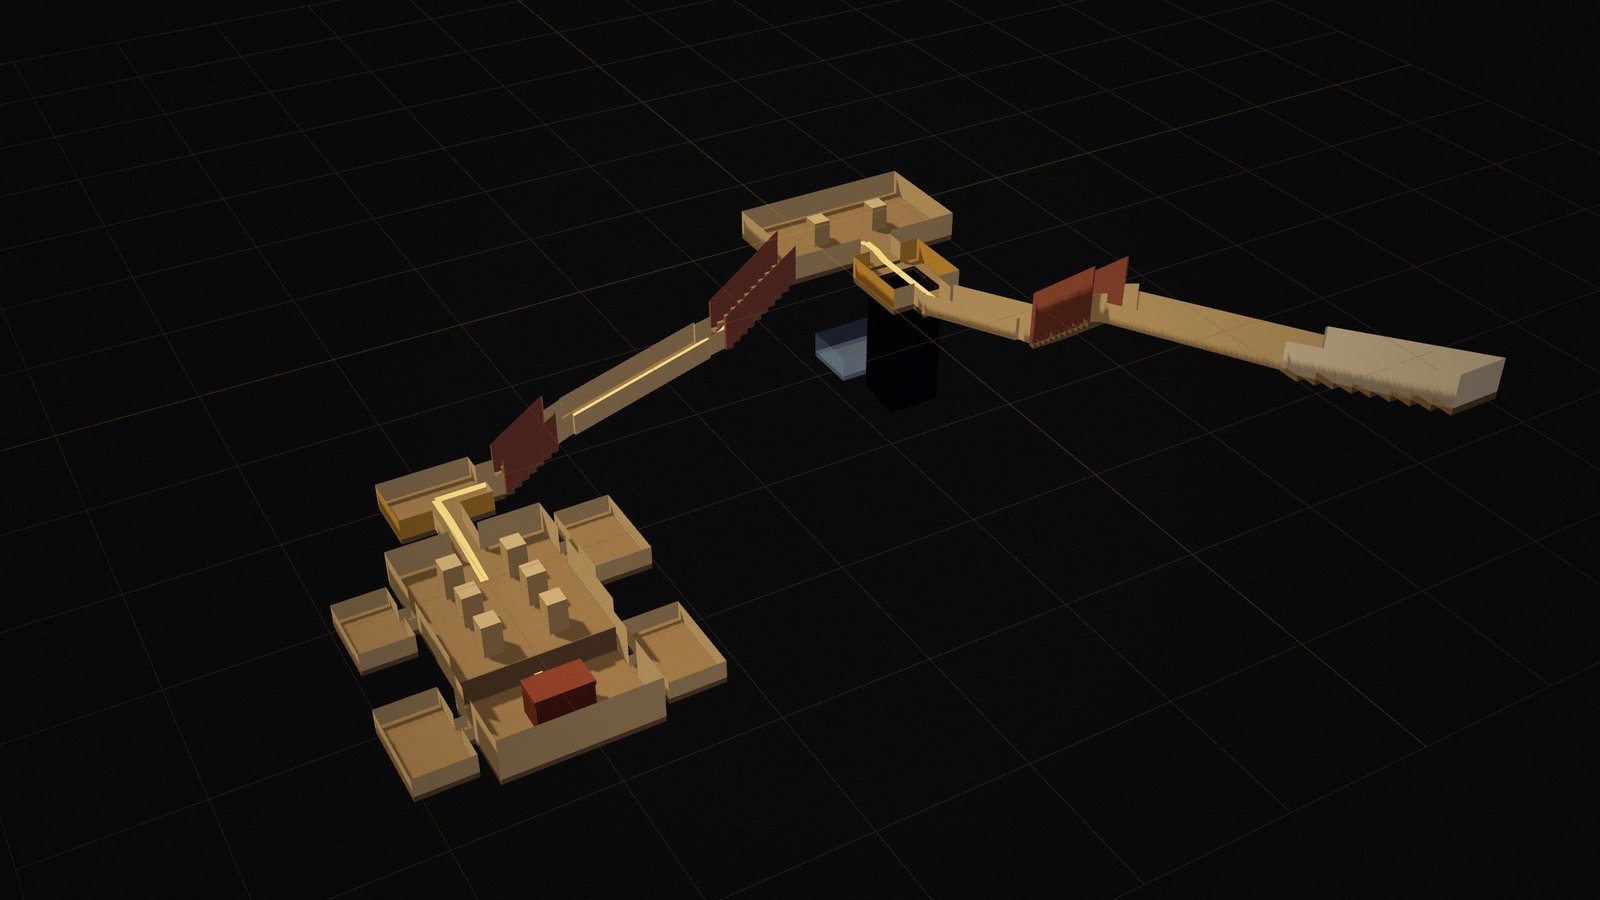
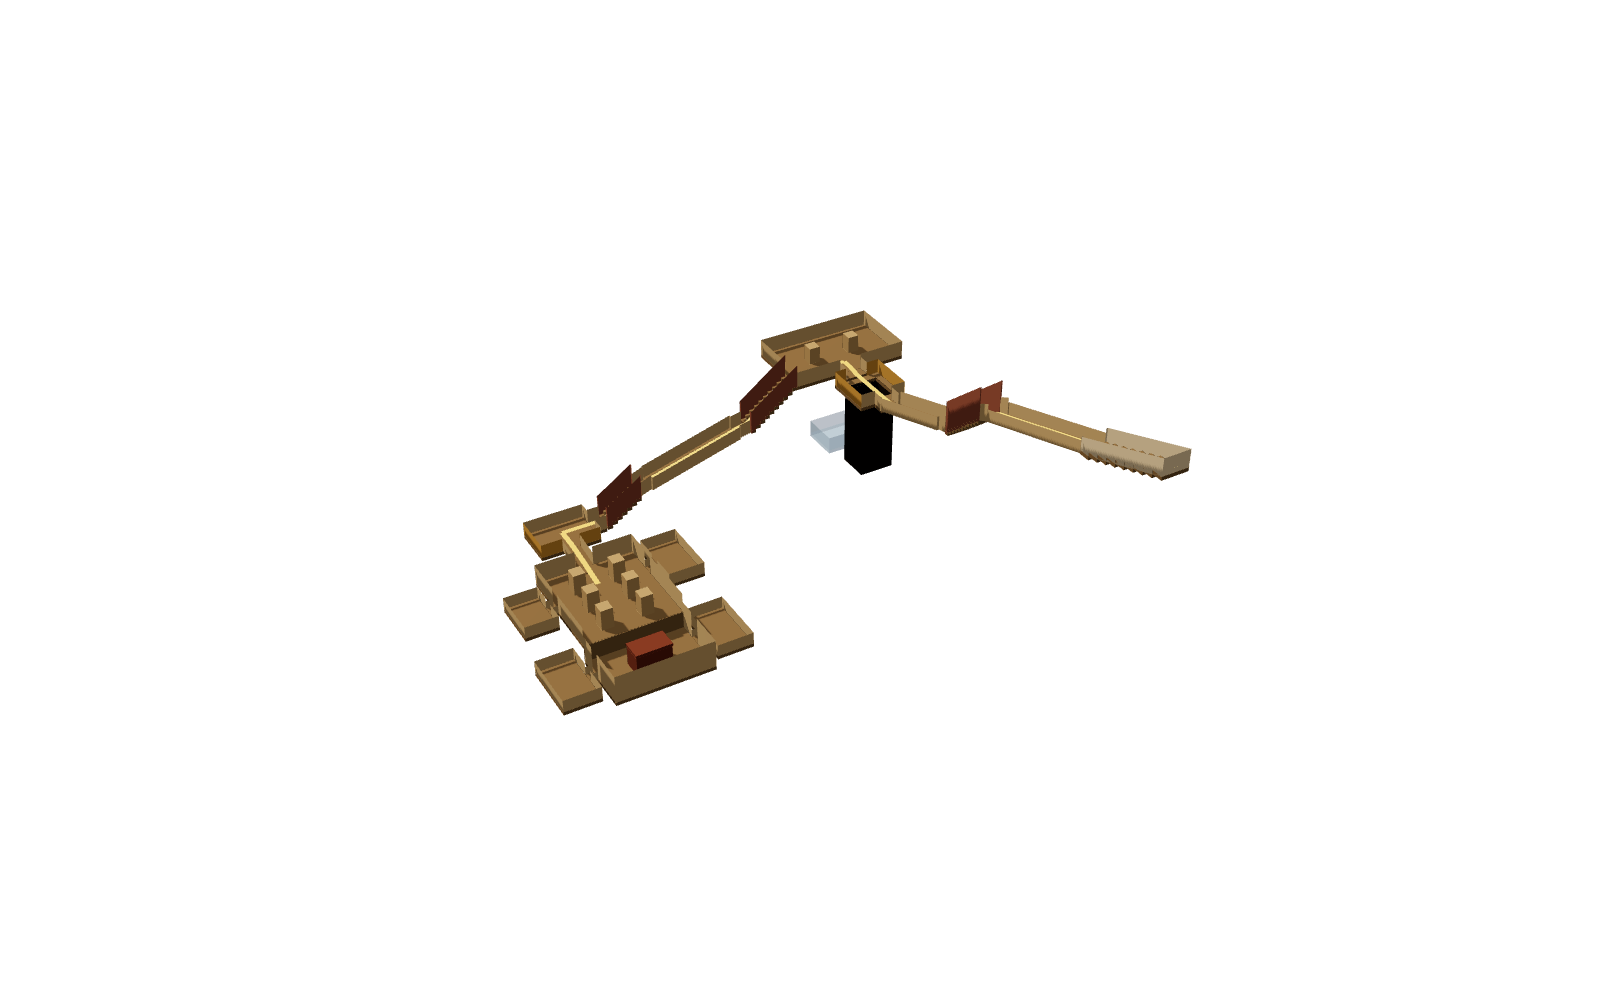
Cut-away 3D model of the tomb of Thutmose IV, whose corridors turn twice at right angles before reaching the pillared burial chamber.
Interpretive 3D model · NeoKemetAI interpretive 3D model
Tomb · 18th Dynasty · Valley of the Kings

KV43: Tomb of Thutmose IV

Valley of the Kings, western Thebes

Thutmose IV, father of Amenhotep III, was buried in a tomb whose axis bends twice at right angles, a layout typical of the mid 18th Dynasty. Only two rooms were painted: the well chamber and the antechamber, where the king appears before the gods on a golden-yellow ground.

Howard Carter found it in 1903, working for the American patron Theodore Davis. Robbers had been there long before. A hieratic graffito records that in year 8 of Horemheb the official Maya restored the burial. Among what remained was the body of the king’s chariot, now in Cairo, and the quartzite sarcophagus, which still stands in the crypt.

The king’s mummy was not here. It had been moved to the tomb of Amenhotep II (KV35), where Victor Loret found it among a cache of royal mummies in 1898.

Inside the tomb

Explore the chambers

Follow the tomb from its entrance to the burial chamber. Select a space in the list, the plan or the 3D model.

Interactive cut-away model of KV43 with its two right-angled turns, decorated well chamber and antechamber, the burial chamber with four side chambers, and the sarcophagus on the lower level.

A · Stairway

Entrance stairway

Documented architecture

Unfinished

Carter found the entrance in January 1903, working for the American patron Theodore Davis. There is no lintel or jambs between the stairway and corridor B.

Unfinished: The rock-cut stairway is roughly cut and unfinished.

8.27 m long × 2.24 m wide, height not published (shown 2.6 m) (published) · Descends from about 0 to 3 m below the entrance · Floor level reconstructed

Note: Length and width follow the survey; the height and drop are reconstructed.

B · Corridor

First corridor

Documented architecture

A long, narrow, undecorated corridor, not preceded by a gate.

11.04 m long × 1.98 m wide, 1.94 m high (published) · Descends from about 3 to 7 m below the entrance · Floor level reconstructed

C · Stairway

Stairwell

Documented architecture

Damaged

A steep stairwell with narrow recesses cut into the tops of the walls on either side.

Damaged: The original steps are badly damaged.

4.19 m long × 1.98 m wide, 5.33 m high (published) · Descends from about 7 to 11 m below the entrance · Floor level reconstructed

D · Corridor

Second corridor

Documented architecture

A long, narrow corridor with a sloping floor and ceiling.

8.19 m long × 1.97 m wide, 2.24 m high (published) · Descends from about 11 to 14 m below the entrance · Floor level reconstructed

E · Well chamber

Well chamber

Documented architecture

A shaft cut through the floor crosses the route. Unusually for this tomb the walls are painted, apparently in haste, with the king before the gods. Both doorways had been sealed in antiquity.

Decoration: Six scenes of the king receiving life from Osiris (two forms), Anubis and Hathor (three forms) on the east wall; kheker frieze; stars on the ceiling. The scenes on the south wall continued onto the blocking of the next gate and were lost when robbers broke through it.

Wall scenes

  • The king before the godsThutmose IV receives life from two forms of Osiris, from Anubis and from three forms of Hathor.

On the model

  • Well shaftReconstructedA vertical shaft; its size and depth (about 7 m in the model) are not published and are illustrative.

4.17 m long × 4.16 m wide, 2.33 m high (published) · Floor about 14 m below the entrance · Floor level reconstructed

Note: The room follows the survey. The shaft is not measured on the survey page and has not been fully cleared; its size and 7 m depth are illustrative only.

Ea · Side room

Chamber at the foot of the shaft

Uncertain or hypothetical

A chamber opening south from the bottom of the well shaft.

About 4.2 × 3.2 m, 2.3 m high (model) · Floor about 21 m below the entrance · Floor level reconstructed

Note: Noted by Carter but now inaccessible, because debris fills the bottom of the well. It lies partly beneath the pillared chamber F; its depth and exact position are unknown.

F · Pillared hall

Pillared chamber

Documented architecture

An undecorated two-pillared chamber. Here the axis turns ninety degrees to the left (east). Red mason's lines on the ceiling mark the axes.

Recorded finds

  • Remains of the king's chariot body (the find spot within the tomb is not recorded here)

6.15 m long × 10.26 m wide, 2.53 m high (published) · Floor about 13 m below the entrance · Floor level reconstructed

Note: The survey gives the room's size and two pillars; the pillar positions and the room's east–west position relative to the entrance axis are reconstructed.

Fd · Stairway

Stepped descent

Documented architecture

Damaged

A stairway leading east from the north end of the pillared chamber's east wall.

Damaged: The original steps are badly damaged.

4.37 m long × 1.99 m wide, 3.81 m high (published) · Descends from about 13 to 17 m below the entrance · Floor level reconstructed

G · Corridor

Third corridor

Documented architecture

A long, narrow corridor sloping down towards stairwell H.

8.21 m long × 1.97 m wide, 2.23 m high (published) · Descends from about 17 to 19 m below the entrance · Floor level reconstructed

H · Stairway

Stairwell

Documented architecture

Damaged

A stairwell with narrow recesses cut into the walls on either side.

Damaged: The stairway is badly damaged.

3.14 m long × 1.9 m wide, 3.95 m high (published) · Descends from about 19 to 22 m below the entrance · Floor level reconstructed

I · Chamber

Antechamber

Documented architecture

The second decorated room, again painted in haste with the king before the gods. Two hieratic graffiti record an inspection of the burial in the reign of Horemheb. The axis turns left (north) a second time into the burial chamber.

Decoration: Osiris, Anubis and forms of Hathor presenting life to the king on the north and east walls, over a visible artists' grid; kheker frieze; stars on the ceiling.

Wall scenes

  • The king before the godsOsiris, Anubis and three forms of Hathor present life to Thutmose IV. The artists' grid shows through the background paint.
  • A restoration graffitoTwo hieratic texts on the south wall record that in year 8 of Horemheb the chief treasurer Maya, assisted by Djehutymes, steward of Thebes, restored the burial after robbers had broken in.

5.19 m long × 3.62 m wide, 2.23 m high (published) · Floor about 22 m below the entrance · Floor level reconstructed

Note: Its north–south position relative to the corridor is reconstructed.

J · Pillared hall

Burial chamber, pillared level

Reconstructed geometry

A six-pillared hall on an upper level. A stepped descent between the last pair of pillars leads down to the sarcophagus. Its walls were never decorated; red mason's lines and conical lumps of plaster survive on them.

About 9 × 8.4 m, 3.2 m high (model) · Floor about 22 m below the entrance · Floor level reconstructed

Note: The overall size of the burial chamber follows the survey (14.42 × 8.36 m, up to 4.45 m high). How it divides between the upper pillared level and the sunken rear level, the pillar positions and the ceiling height of this level are reconstructed.

J↓ · Crypt

Burial chamber, sunken level

Reconstructed geometry

The sunken rear of the burial chamber, where the sarcophagus still stands in a pit on plinth blocks.

On the model

  • Quartzite sarcophagus (in place)ReconstructedCartouche-shaped quartzite sarcophagus, still in place: 3.0 × 1.69 × 1.99 m, painted red with yellow figures and texts.

About 8.4 × 5.5 m, 4.5 m high (model) · Floor about 23 m below the entrance · Floor level reconstructed

Note: The lower level is described but not separately measured; its length and the drop from the pillared level are reconstructed.

Ja · Side room

Side chamber

Documented architecture

An undecorated storeroom west of the burial chamber.

3.11 m long × 5.16 m wide, 1.93 m high (published) · Floor about 22 m below the entrance · Floor level reconstructed

Note: Size follows the survey; its position along the west wall and floor level are reconstructed.

Jb · Side room

Side chamber

Documented architecture

An undecorated storeroom west of the burial chamber. Remains of meat offerings are still strewn on its floor.

Recorded finds

  • Remains of meat offerings

3.12 m long × 5.16 m wide, 1.91 m high (published) · Floor about 23 m below the entrance · Floor level reconstructed

Note: Size follows the survey; its position along the west wall and floor level are reconstructed.

Jc · Side room

Side chamber

Documented architecture

An undecorated storeroom east of the burial chamber.

2.83 m long × 4.15 m wide, 1.93 m high (published) · Floor about 22 m below the entrance · Floor level reconstructed

Note: Size follows the survey; its position along the east wall and floor level are reconstructed.
Jd · Side room

Side chamber

Documented architecture

An undecorated storeroom east of the burial chamber.

3.17 m long × 5.17 m wide, 2 m high (published) · Floor about 23 m below the entrance · Floor level reconstructed

Note: Size follows the survey; its position along the east wall and floor level are reconstructed.

Every chamber, gate and side chamber is sized to the Theban Mapping Project survey of KV 43, using its letters (A–J, Ja–Jd). The sequence and the two left turns of the axis (east at the pillared chamber F, north at chamber I) follow the survey. The survey gives measurements, not coordinates, so the position of each doorway along its wall, the split between the two levels of the burial chamber and all floor depths are reconstructed. Sources and measurements for this reconstruction.

Every chamber, gate and side chamber is sized to the Theban Mapping Project survey; the axis turns left (east) and left again (north). Doorway positions and all depths are reconstructed.

Interpretive model of KV43: Tomb of Thutmose IV. Surfaces are flat colours: decoration is shown as a tint, never redrawn, and nothing is modelled where no plan exists.

How to read our labels
Every image says what it is
Photo
Documented evidence: a photograph of the site or object.
Diagram
A plan, section or map drawn from published measurements.
Reconstruction
A visual reconstruction of how something looked, based on evidence.
Interpretive 3D model
A simplified architectural model to explore; not a survey.
Every space in a tomb has a status
Documented
Space and dimensions follow published surveys.
Approximate
The space is documented; its size or depth here is approximate.
Uncertain
Partly explored or disputed; shown to indicate, not to measure.

Sources for this reconstruction

Every chamber, gate and side chamber is sized to the Theban Mapping Project survey of KV 43, using its letters (A–J, Ja–Jd). The sequence and the two left turns of the axis (east at the pillared chamber F, north at chamber I) follow the survey. The survey gives measurements, not coordinates, so the position of each doorway along its wall, the split between the two levels of the burial chamber and all floor depths are reconstructed.

  1. Theban Mapping Project, "KV 43 (Thutmes IV)", American Research Center in Egypt

    Used for: Chamber sequence and axis turns; length, width, height, area and orientation of every chamber, gate and side chamber; pillar counts and widths; sarcophagus dimensions (3.0 × 1.69 × 1.99 m); decoration by wall; the Horemheb graffiti.

  2. H. Carter and P. E. Newberry, The Tomb of Thoutmôsis IV (Westminster, 1904)

    Used for: Discovery history and finds. Not used for any dimension in this pass.

Floor levels. No depths are published on the Theban Mapping Project page. All floor levels, the depth of the well shaft and the drop to the lower level of the burial chamber are reconstructed.

How to read the model. A space marked documented has the size given in the survey. Where it sits along a wall and how deep its floor lies are reconstructed unless stated. Gates (doorway passages) are modelled at their surveyed thickness and width, which sets the width of each doorway in the model.

Published measurements and the model (29 spaces)
SpacePublished
length × width × height (m)
Model (m)SourceEvidence
A Entrance stairwayStairway8.27 × 2.24 × —18.56 m²Entryway A; orientation 196.92°; roughly cut and unfinished. No height published.8.27 × 2.24 × 2.6Matches (height not published)[1]Documented architectureFloor level reconstructed
B First corridorCorridor11.04 × 1.98 × 1.9421.88 m²11.04 × 1.98 × 1.94Matches[1]Documented architectureFloor level reconstructed
gC Gate CGate1 × 1.81 × 2.711.86 m²1 × 1.81 × 2.71Matches[1]Documented architectureFloor level reconstructed
C StairwellStairway4.19 × 1.98 × 5.338.28 m²4.19 × 1.98 × 5.33Matches[1]Documented architectureFloor level reconstructed
gD Gate DGate1.14 × 1.6 × 2.231.84 m²1.14 × 1.6 × 2.23Matches[1]Documented architectureFloor level reconstructed
D Second corridorCorridor8.19 × 1.97 × 2.2416 m²8.19 × 1.97 × 2.24Matches[1]Documented architectureFloor level reconstructed
gE Gate EGate1.08 × 1.6 × 2.091.72 m²1.08 × 1.6 × 2.09Matches[1]Documented architectureFloor level reconstructed
E Well chamberWell chamber4.17 × 4.16 × 2.3317.24 m²Well chamber E; partly excavated.4.17 × 4.16 × 2.33Matches[1]Documented architectureFloor level reconstructed
gEa Gate Ea (at the foot of the shaft)Gate0.76 × 0.9 × 1.250.68 m²0.76 × 0.9 × 1.25Matches[1]Uncertain or hypotheticalFloor level reconstructed
Ea Chamber at the foot of the shaftSide room3.2 × 4.16 × 2.2513.31 m²Side chamber Ea; unexcavated.3.2 × 4.16 × 2.25Matches[1]Uncertain or hypotheticalFloor level reconstructed
gF Gate FGate1.02 × 1.97 × 2.011.83 m²A step up in the gate.1.02 × 1.97 × 2.01Matches[1]Documented architectureFloor level reconstructed
F Pillared chamberPillared hall6.15 × 10.26 × 2.5363.11 m²Two pillars6.15 × 10.26 × 2.53Matches[1]Documented architectureFloor level reconstructed
Fd Stepped descentStairway4.37 × 1.99 × 3.818.69 m²In the north end of the east wall of F; 90.56° left of F.4.37 × 1.99 × 3.81Matches[1]Documented architectureFloor level reconstructed
gG Gate GGate1 × 1.59 × 2.241.58 m²1 × 1.59 × 2.24Matches[1]Documented architectureFloor level reconstructed
G Third corridorCorridor8.21 × 1.97 × 2.2316.15 m²8.21 × 1.97 × 2.23Matches[1]Documented architectureFloor level reconstructed
gH Gate HGate1.02 × 1.54 × 2.421.56 m²1.02 × 1.54 × 2.42Matches[1]Documented architectureFloor level reconstructed
H StairwellStairway3.14 × 1.9 × 3.955.96 m²3.14 × 1.9 × 3.95Matches[1]Documented architectureFloor level reconstructed
gI Gate IGate1.03 × 1.47 × 2.411.5 m²1.03 × 1.47 × 2.41Matches[1]Documented architectureFloor level reconstructed
I AntechamberChamber5.19 × 3.62 × 2.2318.73 m²Chamber I; the last chamber on the west–east axis.5.19 × 3.62 × 2.23Matches[1]Documented architectureFloor level reconstructed
gJ Gate JGate2.42 × 1.52 × 2.14.15 m²89.65° left of I; a ramp runs through the gate.2.42 × 1.52 × 2.1Matches[1]Documented architectureFloor level reconstructed
J Burial chamberPillared hall14.42 × 8.36 × 4.45120.18 m²Burial chamber J as a whole (both levels); six pillars, average width 1.05 m.14.42 × 8.36 × 4.45Matches[1]Reconstructed geometryFloor level reconstructed
gJa Gate JaGate0.63 × 0.97 × 1.320.6 m²0.63 × 0.97 × 1.32Matches[1]Documented architectureFloor level reconstructed
Ja Side chamberSide room3.11 × 5.16 × 1.9315.98 m²West of J.3.11 × 5.16 × 1.93Matches[1]Documented architectureFloor level reconstructed
gJb Gate JbGate0.63 × 0.96 × 1.270.61 m²0.63 × 0.96 × 1.27Matches[1]Documented architectureFloor level reconstructed
Jb Side chamberSide room3.12 × 5.16 × 1.9115.99 m²West of J.3.12 × 5.16 × 1.91Matches[1]Documented architectureFloor level reconstructed
gJc Gate JcGate0.62 × 0.97 × 1.330.6 m²0.62 × 0.97 × 1.33Matches[1]Documented architectureFloor level reconstructed
Jc Side chamberSide room2.83 × 4.15 × 1.9311.7 m²East of J.2.83 × 4.15 × 1.93Matches[1]Documented architectureFloor level reconstructed
gJd Gate JdGate0.61 × 0.97 × 1.350.61 × 0.97 × 1.35Matches[1]Documented architectureFloor level reconstructed
Jd Side chamberSide room3.17 × 5.17 × 216.41 m²East of J.3.17 × 5.17 × 2Matches[1]Documented architectureFloor level reconstructed
SarcophagusBurial chamber, sunken level3 × 1.69 × 1.993 × 1.69 × 1.99[1]Documented
NeoKemet on YouTube

Watch

Documentary · 24 min · 13 Sept 2026 · 9 chapters

Egyptian Pyramids: The 900-Year Failure Nobody Talks About

Starts at 17:58 — “The machine goes underground”

Why the New Kingdom kings hid their tombs underground in the Valley of the Kings.

Playlist: Ancient Engineering

Gallery

Illustrations

Location

On the map

Tap a marker for details, or zoom out to see the whole Nile valley.

Map showing the location of KV43: Tomb of Thutmose IVMemphisThebesAbydosAmarnaHierakonpolisElephantineAvaris / Pi-RamessesTanisSaisBubastisMendesSebennytosHerakleopolisItjtawyBuhenSemnaKV34 · Thutmose IIIKV43 · Thutmose IVKV62 · TutankhamunKV17 · Seti IKV7 · Ramesses IIQV66 · Queen NefertariStep Pyramid of DjoserGiza PlateauGreat Pyramid of GizaGreat Sphinx of GizaKarnak Temple ComplexMortuary Temple of HatshepsutAbu Simbel TemplesMedinet Habu
Coastline and Nile: Natural Earth 1:10m (public domain). Modern features such as Lake Nasser are omitted. Site positions are approximate.